Mastering Bread Baking Techniques with a Convection Oven
Intro
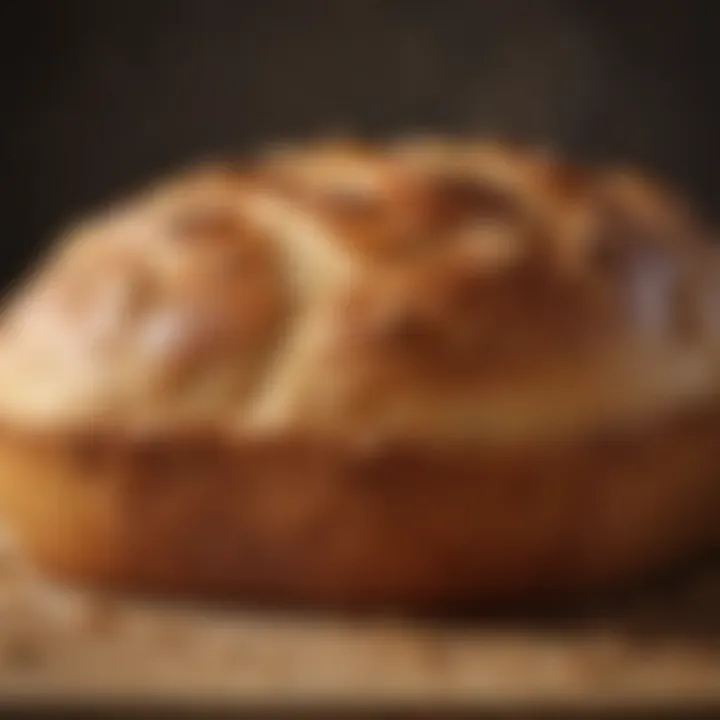
Baking bread can be a delightful journey, filled with the warm, comforting aromas and textures that only a fresh loaf can provide. In today’s fast-paced world, convection ovens have emerged as influential tools in the kitchen. Unlike traditional ovens, which rely on static heat, convection ovens use a fan to circulate hot air around the food, ensuring even cooking and browning. This can produce loaves that have a crispy crust and a wonderfully airy crumb. While many bakers still stick to conventional methods, embracing a convection oven can elevate bread-making to a new level, allowing for consistent results while saving time.
The subtle complexities of this technique lie not just in the mechanics of the oven itself, but also in understanding how to adapt recipes, manage time, and select ingredients. Whether you are a novice looking to impress friends with your baking prowess or a seasoned baker aiming to refine your craft, mastering the art of bread baking in a convection oven offers a wealth of possibilities.
With the right guidance, one can transform simple ingredients into a masterpiece that fills the home with warmth and satisfaction. In the following sections, we will explore the essential elements that make this process a success, ensuring that your baking ventures yield delightful results every time. Let’s roll up our sleeves and knead our way into this exciting culinary experience.
Understanding the Convection Oven
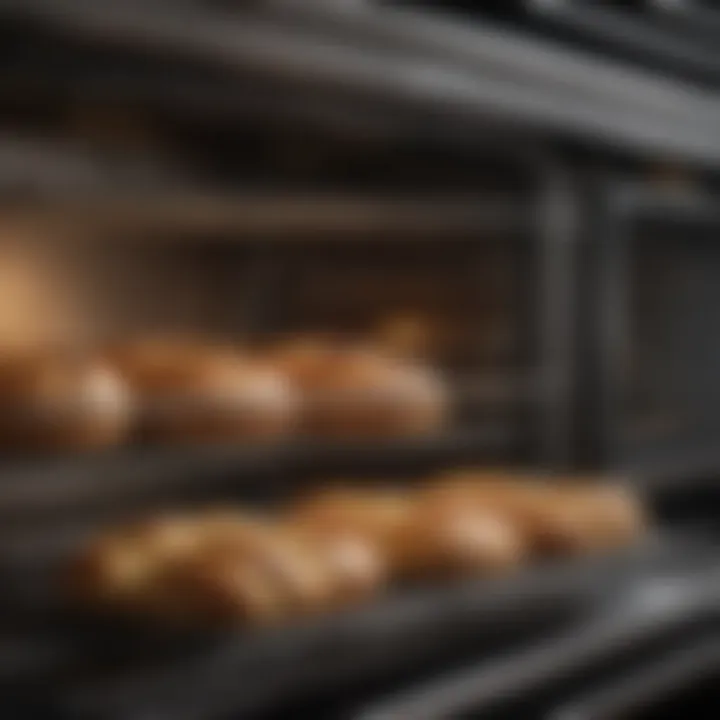
When venturing into the realm of bread baking, understanding the convection oven becomes paramount. This appliance has cemented itself as an indispensable tool for bakers looking to achieve consistent results. Unlike its traditional cousin, a convection oven employs a fan and an exhaust system to circulate hot air around the food. This method optimizes heat distribution, ensuring that every corner of the oven reaches the desired temperature, much like a warm hug around your loaf.
What Makes a Convection Oven Different?
The essence that distinguishes convection ovens from regular ovens lies in their unique heating mechanisms.
- Air Circulation: The fan sends hot air rushing through the oven, eliminating cold pockets that can lead to uneven baking. You can imagine it as having a personal assistant constantly ensuring everything is just right.
- Consistent Temperature: Because of this circulation, convection ovens stabilize the temperature across the entire baking surface. This atmosphere helps bake bread evenly, giving your crust that perfect golden hue.
- Faster Cooking Times: Typically, recipes that demand longer baking times can see a reduction of up to 25%. That’s a considerable slice of time saved in any busy baker's regime.
Thinking of upgrading from a regular oven? The convection model might just be the game-changer you need.
Benefits of Using a Convection Oven for Baking
Diving into the advantages, several key points underline why convection ovens are a favorite among many bakers:
- Superior Texture: The hot air circulating lets the bread develop a delightful crust while maintaining a soft interior. This balance between crispy and tender is not something easily achieved in a conventional oven.
- Energy Efficiency: With shorter baking times and lower temperatures as compared to conventional ovens, there's less energy consumed overall. Who doesn’t love a little green living while they bake?
- Better Browning: The fan helps in achieving a beautifully caramelized crust on your loaves, enhancing both flavor and appeal. This is particularly visible with artisan breads that boast a deep, rich color.
In essence, a convection oven can do wonders for one’s bread-baking abilities, offering benefits that can transform the mundane into the extraordinary.
Common Misconceptions About Convection Ovens
Despite their many advantages, misconceptions about convection ovens abound, causing hesitance among potential users:
- "I don’t need to adjust my recipes!"
- "They’re too complicated to use."
- "They only work for baked goods."
- This is a common fallacy. While toasting a slice of bread might not require adjustments, baking bread typically does. A reduction in temperature and time is essential for optimal results.
- This could not be further from the truth. Once you understand the basics, operating a convection oven is straightforward. It’s much like riding a bike; a little practice and it becomes second nature.
- While it's true swanky desserts and lavish pastries shine in these ovens, they are also excellent for roasting vegetables and meats. Their versatility makes them a powerful ally in the kitchen.
To wrap up, demystifying these misconceptions is crucial in paving the way for happier, more productive baking sessions. Understanding the convection oven equips you to leverage its capabilities in the pursuit of perfect loaves.
Bread Basics: Ingredients and Equipment
Baking bread, especially in a convection oven, is both a science and an art. Understanding the fundamental ingredients and the right equipment can significantly affect the outcome of your baking endeavors. This section aims to deconstruct the core components you’ll require, setting a solid foundation for every loaf you turn out. Getting these basics right is instrumental in mastering the technique, ensuring not just the integrity of the bread but also enhancing flavor and texture.
Essential Ingredients for Baking Bread
Flours and Their Properties
When it comes to choosing flour, it’s not a one-size-fits-all scenario. Each type of flour carries unique properties that influence the structure and taste of your bread. For instance, bread flour has a high protein content, around 12 to 14 percent. This high protein level translates into more gluten formation, providing a chewy texture that’s essential for certain bread types. Many bakers prefer this flour for its ability to create well-structured loaves. On the other hand, all-purpose flour, with its moderate protein content, does a decent job for many recipes but offers less elasticity, which might come into play when determining the loaf's rise.
Using the right flour is truly the bedrock of your bread-baking adventure. Choosing high-quality flours can make a world of difference in your results. But keep in mind, not all flours behave the same, and an understanding of gluten strength can guide you in making the right choice.
Yeast Varieties
Yeast is the little powerhouse behind the rise of your bread. Not all yeast is created equal, so knowing the differences can enhance your baking experience. Active dry yeast is a staple for many home bakers, often requiring proofing in water and sugar before mixing with the dry ingredients. It’s reliable but can be slower to act depending on conditions. On the flip side, instant yeast, or rapid-rise yeast, offers convenience and faster results, integrating smoothly into your flour without the need for pre-proofing. This is a game changer for those who might be pressed for time.
Each variety has its pros and cons, and experimenting with these yeasts may open up new dimensions to your baking, allowing you to customize the fermentation period to your liking.
Role of Hydration
The hydration of your dough is an underappreciated factor in baking bread. It essentially means how much water you’ve incorporated relative to the flour. A higher hydration level leads to a softer crumb and a more open structure. This is especially desirable in artisan breads, producing that sought-after airy texture. Conversely, lower hydration yields denser loaves, which may suit specific recipes better.
The balance of hydration is crucial and can vary greatly between different types of bread. The unique feature of hydration is how it influences the dough's stickiness and handling. Too much water can make the dough unmanageable, while too little could hinder the rise. Therefore, adjusting hydration to match the flour type is fundamental in achieving the perfect result.
Necessary Equipment for Effective Baking
Baking Stone vs. Baking Sheet
Now, let's talk about what you’ll need in your kitchen for optimal results. One key piece of equipment is the baking surface you choose. A baking stone is beloved for its heat retention, mimicking the conditions of a traditional stone oven. This ensures even cooking and helps develop a crisp crust. In contrast, a baking sheet is more convenient and versatile, but it won’t provide the same quality in crust development. The unique feature of a baking stone is its ability to store heat, creating steam during the initial baking phase, which is crucial for oven spring. However, it does require a bit more care during use and storage.
Measuring Tools
Precision is the name of the game in baking. Having reliable measuring tools is paramount. A good kitchen scale provides accurate measurements, allowing for consistency across batches. Cup measurements can vary depending on how one scoops, leading you into a world of inconsistency. Additionally, using measuring spoons for tiny quantities of salt or yeast can prevent daunting miscalculations. Proper measuring tools bring both accuracy and reliability into your baking process.
Oven Thermometer: Importance
You wouldn’t drive a car without a speedometer, right? The same goes for your oven. An oven thermometer helps guarantee that your convection oven is hitting the right temperatures. Many built-in oven thermometers are notoriously unreliable. A simple, external oven thermometer can help take the guesswork out of it, ensuring that your bread bakes evenly. The unique aspect of maintaining an accurate temperature leads to better-controlled baking, directly affecting the texture and rise of your loaves. Having this tool in your arsenal can save many a loaf from disaster.
Adapting Recipes for Convection Baking
Baking in a convection oven possesses a few quirks compared to traditional ovens. Understanding how to adjust your recipes for convection baking is paramount. It helps achieve that perfect loaf with the pleasing crust and texture that many bakers aim for. Properly adapting your recipes can truly optimize the results.
Adjusting Temperature and Time
Standard Conversion Guidelines
When baking with a convection oven, it's a good rule of thumb to reduce the baking temperature by about 20 degrees Fahrenheit compared to what traditional recipes suggest. This reduction is due to the fan-induced circulation of hot air which evenly distributes heat. Consequently, your bread bakes more quickly and evenly.
This guideline is hugely beneficial as it allows for consistent results, preventing those frustrating mishaps that often arise from incorrect temperatures. An important thing to keep in mind is that every oven operates a bit differently, so while it's a general rule, tweaking it based on your specific heat distribution may be necessary.
"Adjusting your temperature and time not only improves your bread but also contributes to developing better baking instincts."
The specific feature of this guideline here is its simplicity. Bakers can easily adjust their favorite recipes without needing esoteric knowledge of baking science. However, it must be noted that too much reduction can lead to underbaked bread, especially for recipes that rely heavily on rising.
Testing for Doneness
Figuring out when your bread is done baking can feel somewhat like wandering in a foggy forest; it's all too easy to get lost or second-guess your instincts. With regular ovens, you might often rely on cooking times alone, but in convection baking, a more hands-on approach is crucial. Listening and observing are key components here. One well-accepted method to test for doneness is the tap method—tap the bottom of the loaf with your fingers. If it sounds hollow, you're likely in the clear.
Another great method is to use an instant-read thermometer. A perfect internal temperature for bread usually falls between 190 and 210 degrees Fahrenheit. This dual approach gives bakers a solid advantage and peace of mind when monitoring their creations.
The unique upsides of this testing method are reliability and objectivity; you’re not just guessing anymore. That said, one must keep in mind that different styles of bread could require different techniques to test doneness, making it vital to know your recipe's specifics.
Ingredient Adjustments in Convection Baking
Adapting your ingredients, in conjunction with adjusting temperature and time, is another essential aspect of baking bread in a convection oven. Ingredients play such a significant role in how your loaf performs that ignoring their needs can lead to subpar results.
Considering Sugar and Fats
Both sugar and fats can behave differently in a convection oven compared to traditional settings. Sugar not only acts as a sweetener but it caramelizes during baking, contributing to that delightful crust. In a convection setting, however, sugars can caramelize a bit quicker, which could lead to an overly dark crust unless adjustments are made. To tackle this, consider cutting back slightly on the sugar or turning the temperature down a notch more than the usual guidelines suggest.
On the other hand, fats also react uniquely. When baking with fats, like butter or oil, reducing amounts might be worth it too. They can increase the moisture and richness, but when combined with the high heat from convection, you might end up with greasier loaves. Playing around with fat proportions might offer better results.
Hydration Levels


Water content in your bread dough is another topic that often flies under the radar but can completely change the game in convection baking. Convection ovens can produce more steam due to their efficiency, which can affect how the bread rises during baking. If a recipe calls for high hydration, consider slightly reducing the liquid. Conversely, if your dough feels dry, it may be worth adding a touch more water to encourage elasticity without causing issues.
The key characteristic here lies in a delicate balance. Too much hydration can lead to overly wet dough that doesn't hold shape well, while too little can cause dryness and a lacking crumb structure. Understanding how your specific recipe's hydration interacts with a convection oven's capabilities can yield fantastic results.
Perfecting Techniques for Convection Baking
When it comes to baking bread, the techniques you use can make all the difference in achieving that coveted loaf with the perfect crust and a soft, airy interior. In a convection oven, which circulates hot air for even cooking, perfecting these methods is essential. Adapting your baking techniques ensures that you are leveraging the convection oven's capabilities to their fullest extent, creating a product that's not only visually appealing but also scrumptious to devour.
Kneading and Shaping the Dough
Kneading is a critical step when preparing bread dough. It's not just about combining the ingredients but also about developing gluten, which gives bread its structure.
- Importance: Proper kneading ensures that the dough has the right consistency, elasticity, and strength. When working with a convection oven, achieving a smooth, well-kneaded dough is a step towards a beautifully risen loaf.
- Techniques: You can use the classic push-fold method or the slap-and-fold technique. Each method adds its own unique texture. The amount of kneading can also vary depending on the flour type. Bread flours require more kneading than all-purpose flour due to their higher protein content.
Shaping the dough is equally vital, as it affects the final loaf’s appearance and texture. Proper shaping helps to create surface tension in the dough for a good rise in the oven.
Proofing Techniques
Proofing is the stage where yeast works its magic, making the dough rise. For convection baking, understanding how to effectively proof your dough can enhance your baking process.
Duration and Environment
The duration and environment for proofing are two crucial aspects that every baker needs to get just right. Ideal proofing should take place at a warm location, ideally around 75°F to 80°F, where the yeast can thrive. Too much heat or too cold can lead to under-proofed or over-proofed dough.
- Key Characteristic: A well-regulated environment encourages even fermentation, resulting in a consistent rise across the dough.
- Benefits: Proofing your dough long enough allows for the development of richer flavors and a more complex texture. A sluggish proofing environment can lead to a dense loaf; thus, a warm, draft-free spot is ideal for successful proofing.
Signs of Proper Proofing
Knowing when your dough is properly proofed is an art in itself.
- Key Characteristic: A properly proofed dough expands and should almost double in size. You can also conduct the "poke test." When you gently poke the dough with your finger, it should spring back slowly without collapsing completely; this indicates good fermentation.
- Unique Feature: The signs of proper proofing distinguish between a light, airy loaf and a dense brick. Observing these signs allows bakers to apply tweaks to their techniques.
Scoring Bread Before Baking
Scoring, or making shallow cuts on the surface of the dough, is often overlooked but serves a vital purpose.
- Importance: Scoring allows gases to escape during baking, preventing the dough from splitting unevenly. This not only impacts the final shape but also enhances the crust’s texture.
- Technique: Utilize a sharp bread lame or a knife to slice the dough. Each cut’s depth and angle can change the crust’s appearance, allowing for creativity even in conventional baking.
Troubleshooting Common Issues
Baking bread in a convection oven can often feel like navigating a maze. The art of making loaves is as much about the process as it is about the outcome. Therefore, understanding common challenges can help bakers adapt and thrive. Troubleshooting issues is crucial; it equips bakers with the knowledge to identify areas for improvement, leading to consistently delightful results. Be it balancing time and temperature or adjusting ingredients, adept troubleshooting can transform a decent loaf into a memorable one.
Underbaked or Overbaked Loaves
One of the most common problems bakers face is the underbaked or overbaked loaf. The convection oven's heating method often throws a spanner in the works, making it tricky to get the timing perfect. Underbaked loaves can lead to a gummy interior, while overbaked varieties may come out hard as a rock. To avoid these pitfalls, it's essential to pay close attention to the following:
- Use an oven thermometer. Convection ovens can heat unevenly. An external oven thermometer helps you know the real temperature inside.
- Check for visual cues. Look for a golden-brown crust and listen for a hollow sound when you tap on the bottom of the loaf.
- Adjust your baking time. As a rule of thumb, reduce the baking time by about 25% compared to standard baking. Always do a quick check a few minutes before the recipe suggests.
By doing so, you’re less likely to experience the disappointment of a poorly baked loaf.
Inconsistent Crust and Texture
The crust and overall texture can make or break a loaf. It’s not uncommon to find some areas beautifully crusty while others remain soft or soggy. This inconsistency may stem from various factors:
- Air circulation. Convection ovens thrive on airflow, but if your oven is too crowded or if you place multiple trays closely together, the hot air can't circulate properly, leading to uneven baking.
- Oven rack position. Depending on where your bread sits, the heat intensity might vary. Placing it in the center rack generally yields the best results.
- Preheating is key. Ensure your oven is entirely heated before placing the dough inside. A sudden temperature change can affect crust development.
Taking these steps can significantly enhance your crust and texture, resulting in that perfect loaf.
Identifying and Addressing Flavor Issues
Flavor is the heart and soul of bread. A loaf that looks good on the outside can fall short if the taste doesn’t live up to expectations. Several flavor issues might arise when baking in a convection oven:
- Ingredient quality. Start with good-quality flour, fresh yeast, and clean water. Stale or poor ingredients can lead to bland bread.
- Flour selection. Different flours have unique flavor profiles. Whole wheat flour can bring nutty undertones, while artisan bread flour might offer a cleaner taste. Choosing wisely can markedly improve flavors.
- Proper fermentation. Not allowing sufficient time for dough to rise can result in flat flavors and dry crusts. Proofing dough correctly enhances its natural flavors, giving it more depth.
"Good bread is the foundation of all great meals. Knowing how to troubleshoot flavor issues is essential for achieving that foundation."
By familiarizing yourself with these challenges and keeping a close eye on details, you can rise above the usual pitfalls of baking bread in a convection oven. Your journey from troubleshooting to mastering the art of bread baking in a convection oven can ultimately lead to delicious results that satisfy both your palate and your guests.
Diverse Bread Types Suitable for Convection Ovens
When it comes to baking bread, the choice of oven can significantly influence the end result. Convection ovens, with their circulating hot air, provide a unique environment that is particularly beneficial for various types of breads. Identifying which types of bread can maximize the advantages of convection technology is essential for bakers seeking perfection.
The significance of this topic not only reflects on the diversity of bread styles but also illustrates the versatility of convection ovens. These ovens can achieve a pleasing texture, improved crust development, and enhanced flavor profiles when baking different bread types.
The benefits of using convection ovens for specific breads include better heat distribution, reduced baking time, and an overall consistent quality across batches. However, with this variety comes the need for careful attention to baking methods, temperatures, and times.
"In the world of bread, each variety tells its own story and shows the magic of combining basic ingredients into something wonderful."
Artisan Breads
Artisan breads are a celebration of quality ingredients and traditional techniques, often characterized by their crusty exteriors and chewy interiors. These breads benefit greatly from convection baking due to the efficient heat circulation, which promotes even browning and a crispy crust.
Examples of artisan breads include country loaves, baguettes, and ciabatta. When using a convection oven for these, it's essential to consider the following:
- Temperature Adjustments: Typically reduce the temperature by 25°F compared to conventional baking. The consistent heat helps in achieving that artisan quality without the risk of over-baking.
- Steam Introduction: While convection naturally dries the environment, introducing steam during the initial phase of baking can enhance the crust. A pan of water on the bottom of the oven can work wonders.
- Scoring: Properly scoring your loaves allows for controlled expansion and contributes to the visual appeal of the bread.
Sourdough and Other Fermented Breads
Sourdough and other fermented varieties have a personality of their own. The natural fermentation process introduces complexity in flavor that responds well to the convection oven. These breads often have a more open crumb structure, which is enhanced by the even cooking conditions created by the convection.
- Temperature Control: As with artisan breads, a drop in temperature—again, about 25°F—is advisable to prevent excessive crusting before the interior is cooked through.
- Proofing Time: Sourdough often requires careful proofing. If ambient temperatures are high, this process can speed up, so keeping an eye on dough activity is crucial.
- Unique Flavors: Fermentation impacts flavor significantly, creating tangy tones that resonate well with many palates, especially when the bread is paired with savory toppings.
Quick Breads and Yeast Breads
Quick breads, such as banana bread or zucchini bread, and yeast breads like dinner rolls, provide a contrasting profile to the more traditional loaves. Quick breads rely on chemical leavening (baking powder or soda), making them less sensitive to the type of oven used. However, convection does enhance the texture and moisture retention in quick breads, resulting in a more flavorful outcome.
- Baking Time: These breads usually require less time in the oven. A cursory glance at the clock might suffice; typically, you can check for doneness a few minutes earlier than conventional methods suggest.
- Volume Consideration: Mix that batter well! Since quick breads do not require much rising time, a successful mix ensures proper volume and ideal internal structure.
- Experimentation: With yeast breads, feel free to trial various recipes; the benefits of convection can make even simple rolls shine.
In summary, understanding the diversity of bread types and their suitability for convection ovens can profoundly impact baking outcomes. Whether one gravitates towards artisan, sourdough, or quick breads, knowing how to leverage the convection environment will surely enhance the home baking experience.
Storing and Maintaining Freshness
Baking bread is a true labor of love. After putting in the effort to create a perfect loaf, the last thing a baker wants is for it to go stale before it can be enjoyed. For many home bakers, knowing how to appropriately store bread is just as crucial as the baking process itself. Not only does proper storage extend the life of your freshly baked bread, but it also helps maintain its texture and flavor, ensuring every slice is as delightful as the first.
Here, we'll explore key elements and benefits related to effective bread storage. Freshness is paramount in showcasing the results of your hard work; stale bread is disappointing both in taste and enjoyment. With a few strategies in your toolkit, you can easily sustain the qualities that made your bread shine in the first place.
Best Practices for Storing Baked Bread
Storing bread the right way involves more than simply putting it in a cupboard. Here are several best practices to keep in mind:
- Cool it First: Before you store your loaf, let it cool completely on a wire rack. Trapping steam inside a warm loaf invites mold, which is something we all want to avoid.
- Choose Your Wrappings Wisely: For bread that’s intended to be enjoyed within a few days, a bread box or a paper bag can allow it to breathe, which helps maintain the crust's crunch. For longer storage, use plastic wrap, but not for short-term use as it can soften your crust.
- Slice Before Storing: If you think you won’t eat the whole loaf at once, consider slicing it beforehand. Individual slices are easier to toast or reheat later without compromising the entire loaf.
- Keep it Away from Sunlight: Heat and light can degrade the quality of your bread quickly. Store it in a cool, dark place to maintain freshness.
"Proper storage isn't just a matter of longevity; it's about preserving the taste and excitement in each bite."
Freezing Bread for Long-term Storage
When you know you won’t consume your bread within a few days but don’t want to sacrifice flavor and texture, freezing is your best bet.
Here’s how to do it correctly:
- Wrap it Securely: Use plastic wrap or aluminum foil to wrap the bread tightly. If you have a vacuum sealer, that would do a perfect job. This prevents freezer burn and helps keep the moisture locked in.
- Label and Date: Mark the package with the type of bread and the date. This way, you won’t be guessing what’s in the freezer months later.
- Thawing Properly: When ready to eat, allow the bread to thaw at room temperature. For a crisp crust, pop it in the oven for a few minutes after thawing. Alternatively, a toaster works wonders for individual slices.
- Consider Portion Sizes: If you’re making multiple loaves, separate them into smaller portions before freezing. This makes it easier to take out just what you need without having to defrost a whole loaf.
In summary, mastering the art of storing and maintaining the freshness of your bread ensures that you get to savor each delicious bite. With these practices and methods, you’ll prolong the life of your hard work and enjoy your creations fully.


